
How to use Github and Vercel to Deploy a Hexo Blog and Config it
1.Beginning
This tutorial will guide you to create a Hexo Personal Blog using Github+Vercel and config it.
1.1 Why Hexo?

Many bloggers are using Hexo Framework as their own systems instead of WordPress or Typecho. This is because static blogs like Hexo can be deployed in many stable and free environments, and most importantly, the loading speed is fast.
Advantages
- Free and stable.
- You don’t have to spend too much effort on keeping the blog running.
Hexo framework is the most popular one among all the static blog systems.
Of course, if you want to use Hugo as the framework, you can also follow this tutorial.
1.2 Plan
Put Hexo files on Github and then let Vercel automatically pull the files and then deploy.
2. Installation guide
2.1 Account Preparation
Please register: Github Account
Then go to Vercel And use Github Account to register vercel account. After that, you can see the github repos in vercel.

2.2 Create Hexo Repository
This one is simple. Click Add New and choose Project
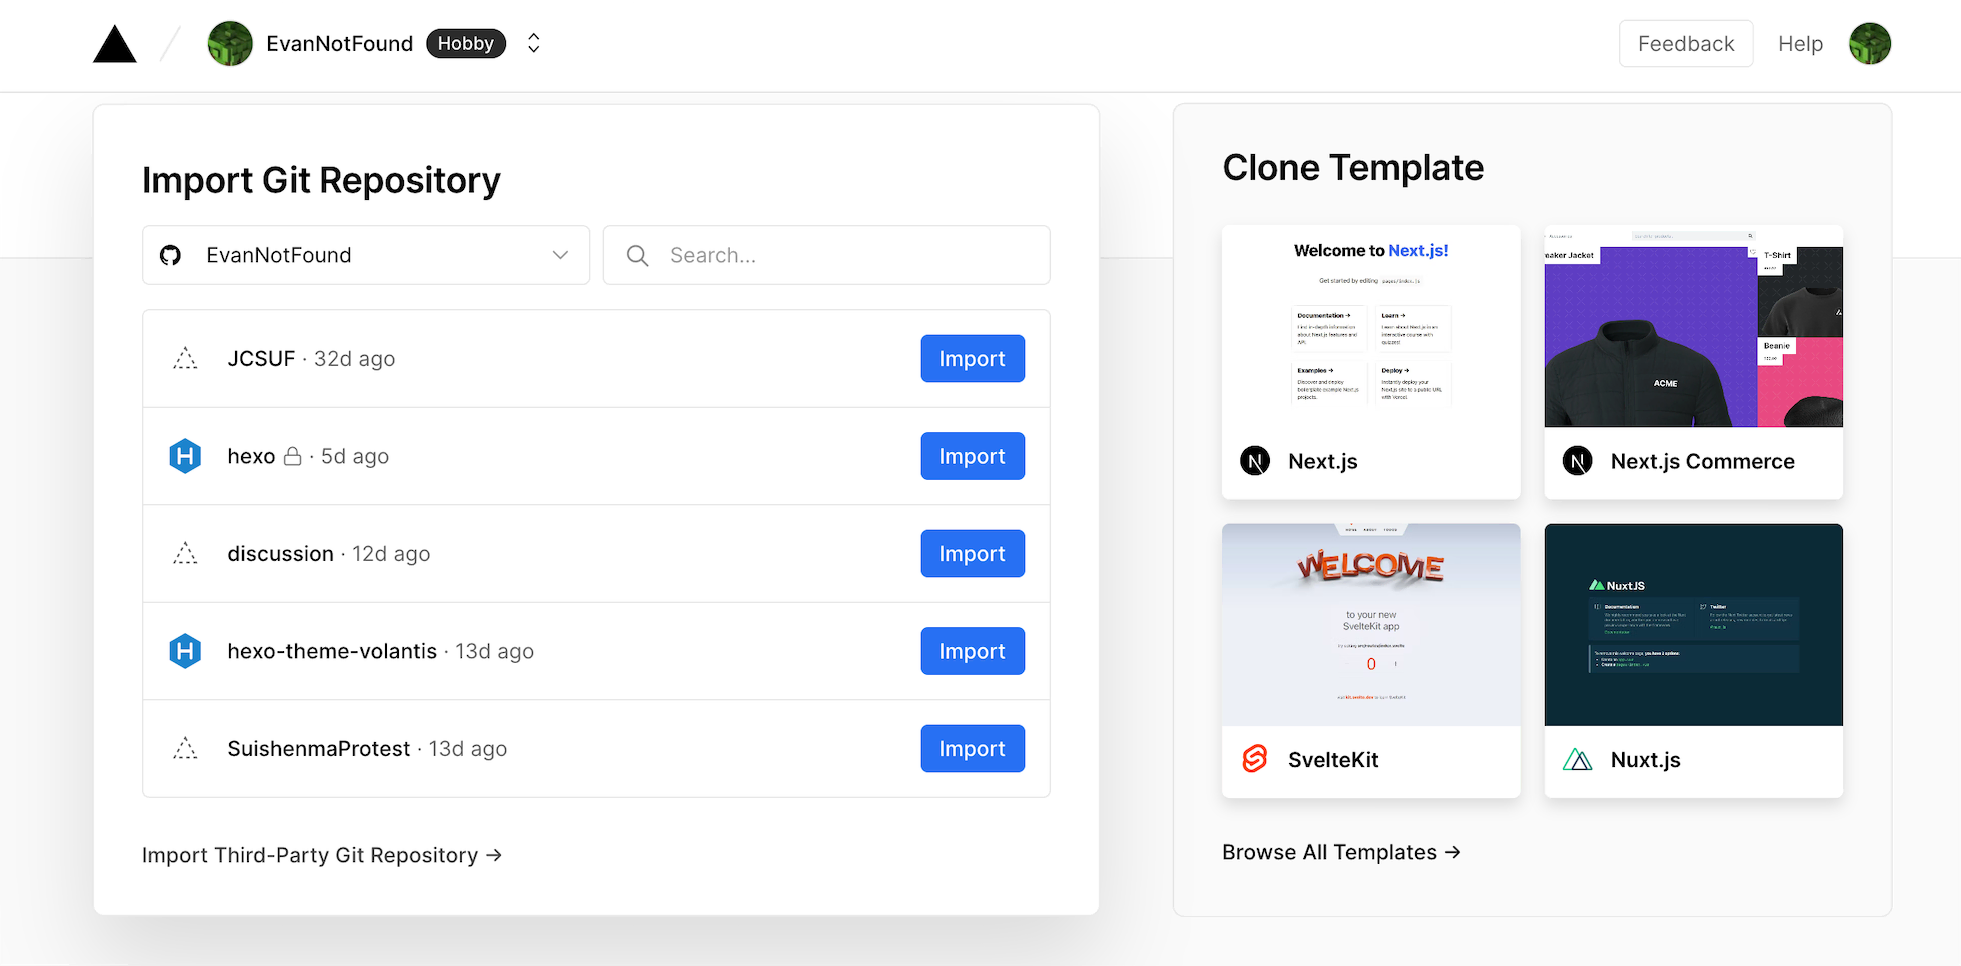
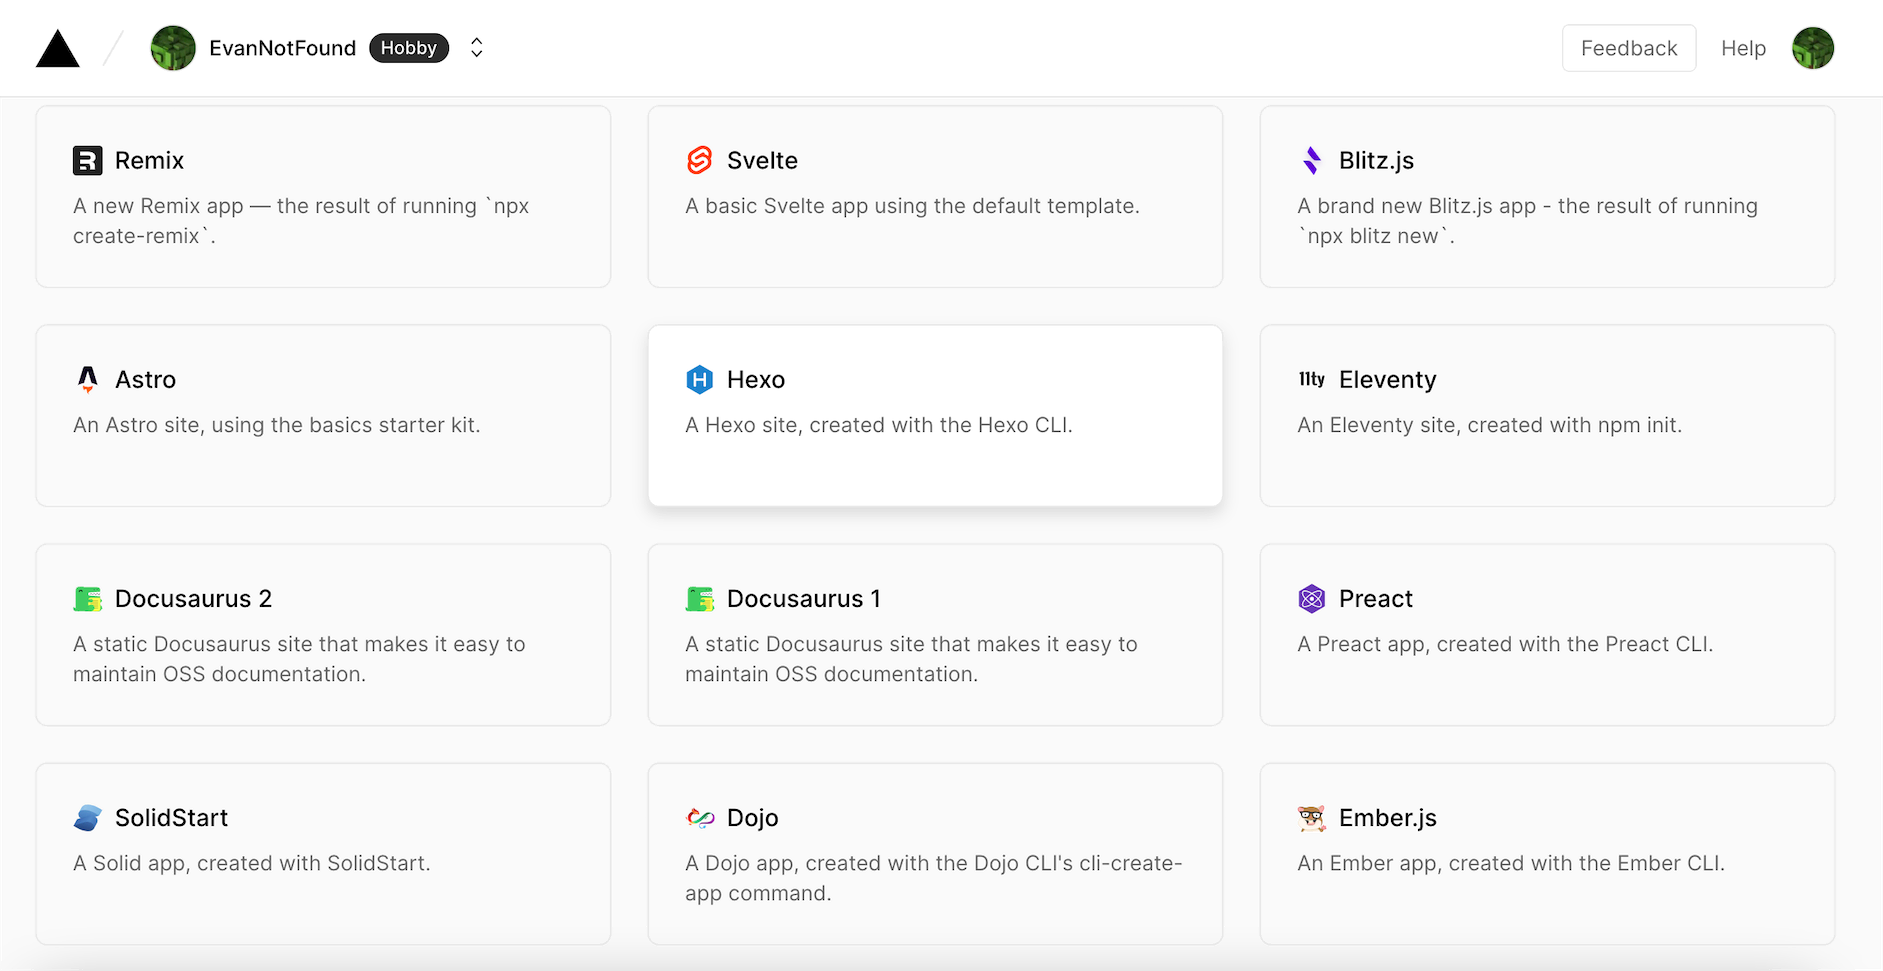
Check the Clone Template on the right and click Browse All Template.
Find Hexo
Then it comes to the page of creating Hexo repo.
The Git Scope is you github account username. The REPOSITORY NAME on the right is you Hexo repo name. You can customize it.
Keep repo Private, so others won’t see you original files.

Finally click Create.

After that, you will get a Hexo domain. This second-level domain name belongs to you and will not be recycled. I recommended to use it temporarily when debugging.
This vercel deployment is bound to the repository you just created on Github. Once you changed the repository on Github, vercel will automatically pull the files and deploy.
You can now click on that second-level domain to see your Hexo blog.
But long-term use is not recommended.
Here are the reasons
- The
vercel.appdomain has been blocked by Google, Bings etc. - You can’t submit it to search engines and see the analytics.
So I recommend you to use your own domain. I’ve been using Namesilo to register my domains.
2.3 Debug Locally
If you want to change your blog files directly on Github, it is fine, but you have to wait for Vercel to automatically deploy after the modification, which is very slow and inconvenient.
And the limit of the blog deployment frequency of vercel is 100 times/day.
Therefore, it is recommended that you install the hexo environment for debugging locally. Also you can see the changes immediately after you modified the files. After that, you can directly git push to your Github project.
2.3.1 Environment Configuration
Both Macos and Windows can install the environment.
First is Git, you can go to Git Official Site and download&install it.
Then it is Node.js, you can go to Node.js Official Site and download&install it.
Then it comes to Environment Verification
macOS User please open
TerminalWindows User Please open
Git bash
Use this command to check the version:
1 | $ node -v |
If you can see the version, that means you’ve successfully installed Node.js.

2.3.2 Config Hexo Environment
macOS User please open
TerminalWindows User Please open
Git bash
Use this command to install hero-cli:
1 | $ npm install -g hexo |
Wait for a minute.
When it says hexo@[version], that means you successfully installed hero-cli.
2.3.3 Config GitHub & SSH key
macOS User please open
TerminalWindows User Please open
Git bash
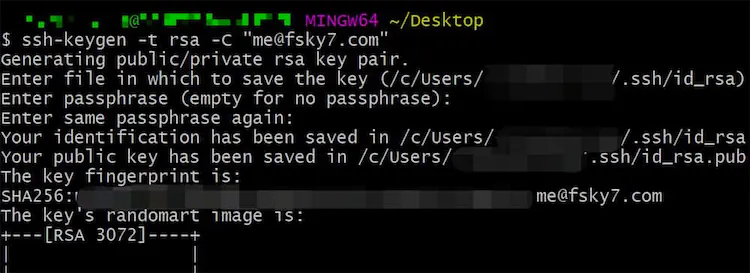
Open Git Bash/Terminal, type in this command:
1 | $ ssh-keygen -t rsa -C "You email address" |
Press Enter 3 times, and the command lines will show you the directory of the public key and private key (here I stole a picture).
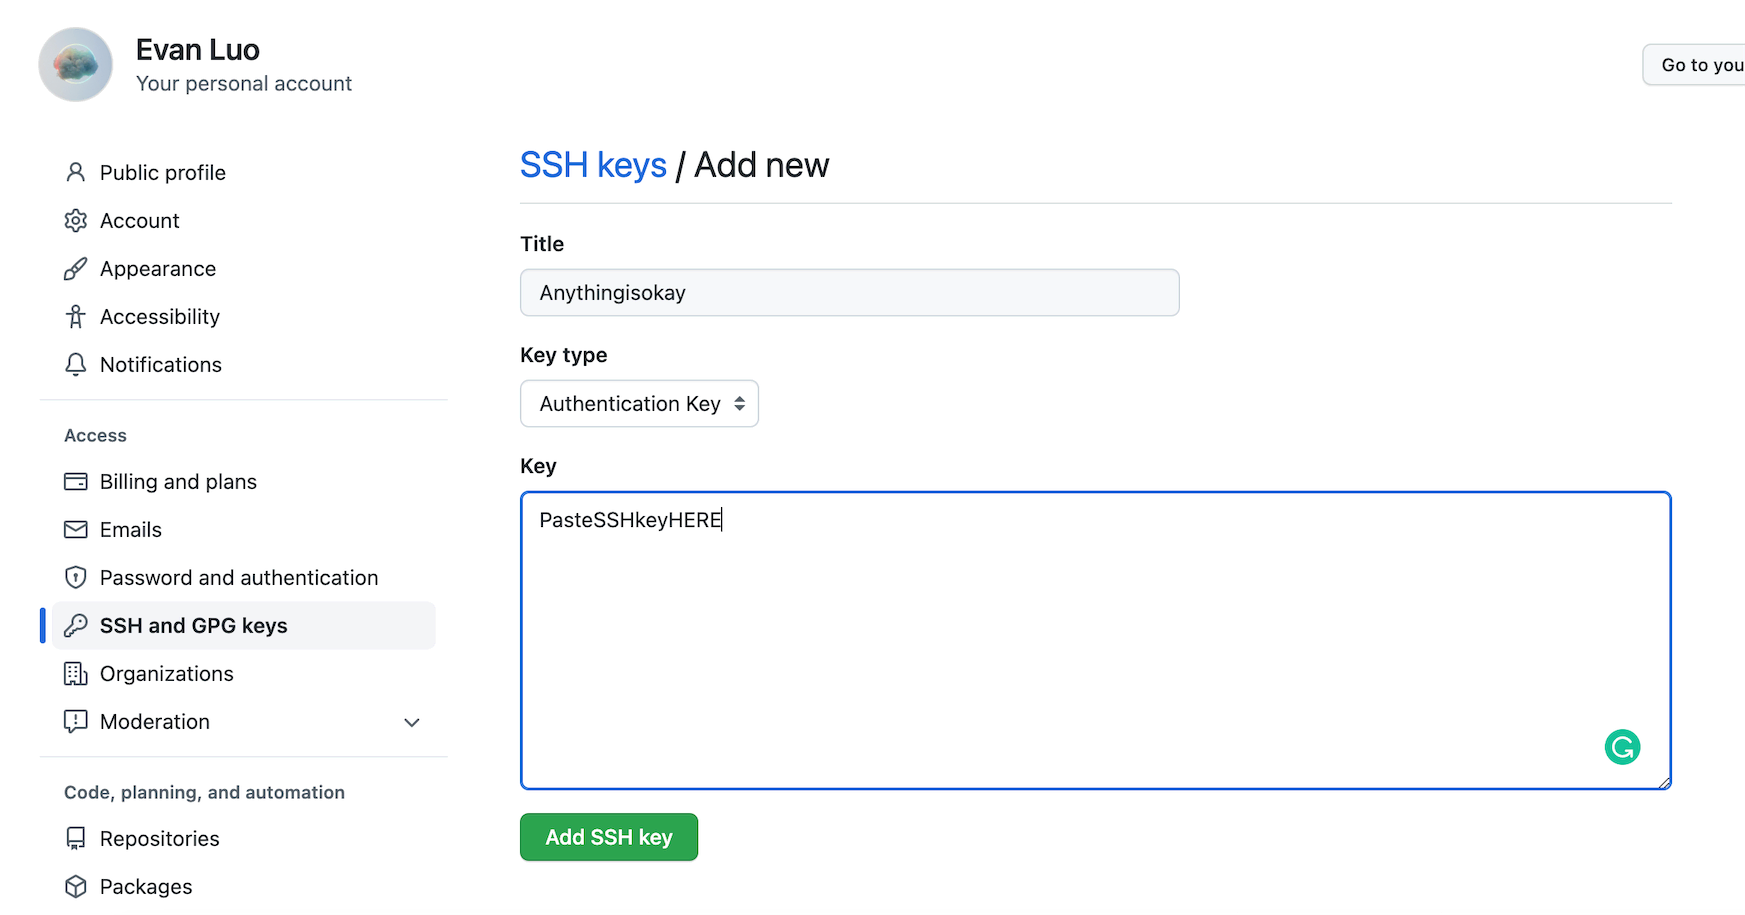
Find the directory of id_rsa.pub and use VScode or text editor to open this file. Copy all things inside. Go to GitHub -> Settings -> SSH and GPG keys -> New SSH key. Here is the link: Click
Title is up to you. Paste the things you copied in to Key, and then click Add SSH Key.
Next it’s Git
Run these command in terminal/git bash.
1 | $ git config --global user.name "Your GitHub username" |
Verify
1 | $ ssh -T git@github.com #don't need to change email address |
If you see Are you sure you want to continue connecting (yes/no)? , type yes and press Enter.
If you see:
1 | Hi [Your github username]! You've successfully authenticated, but GitHub does not provide shell access. |
That means your config is correct.
2.3.4 Clone Github Repo
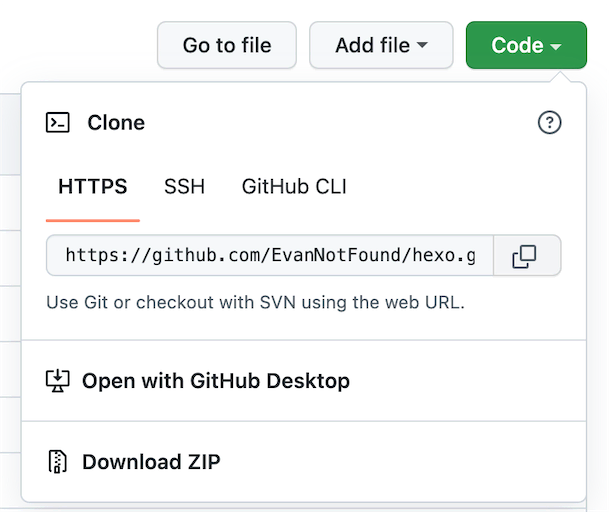
Go to your Github hexo repo, and click Code and copy the link below HTTPS.
First cd to your folder that you want to put your blog in, and then use the following command to clone it into you folder.
1 | $ git clone [PASTE YOU LINK] |
Like this:

Private repo clone will require Github email and password.
If you put your password in, you will find that you can’t authenticate. This is because Github has already closed password login support.
So please go to Github -> Settings -> Developer Settings -> Personal Access Token and create a token. Link here: HERE
Note is up to you, Expiration choose No expiration, and check repo .
Like this:
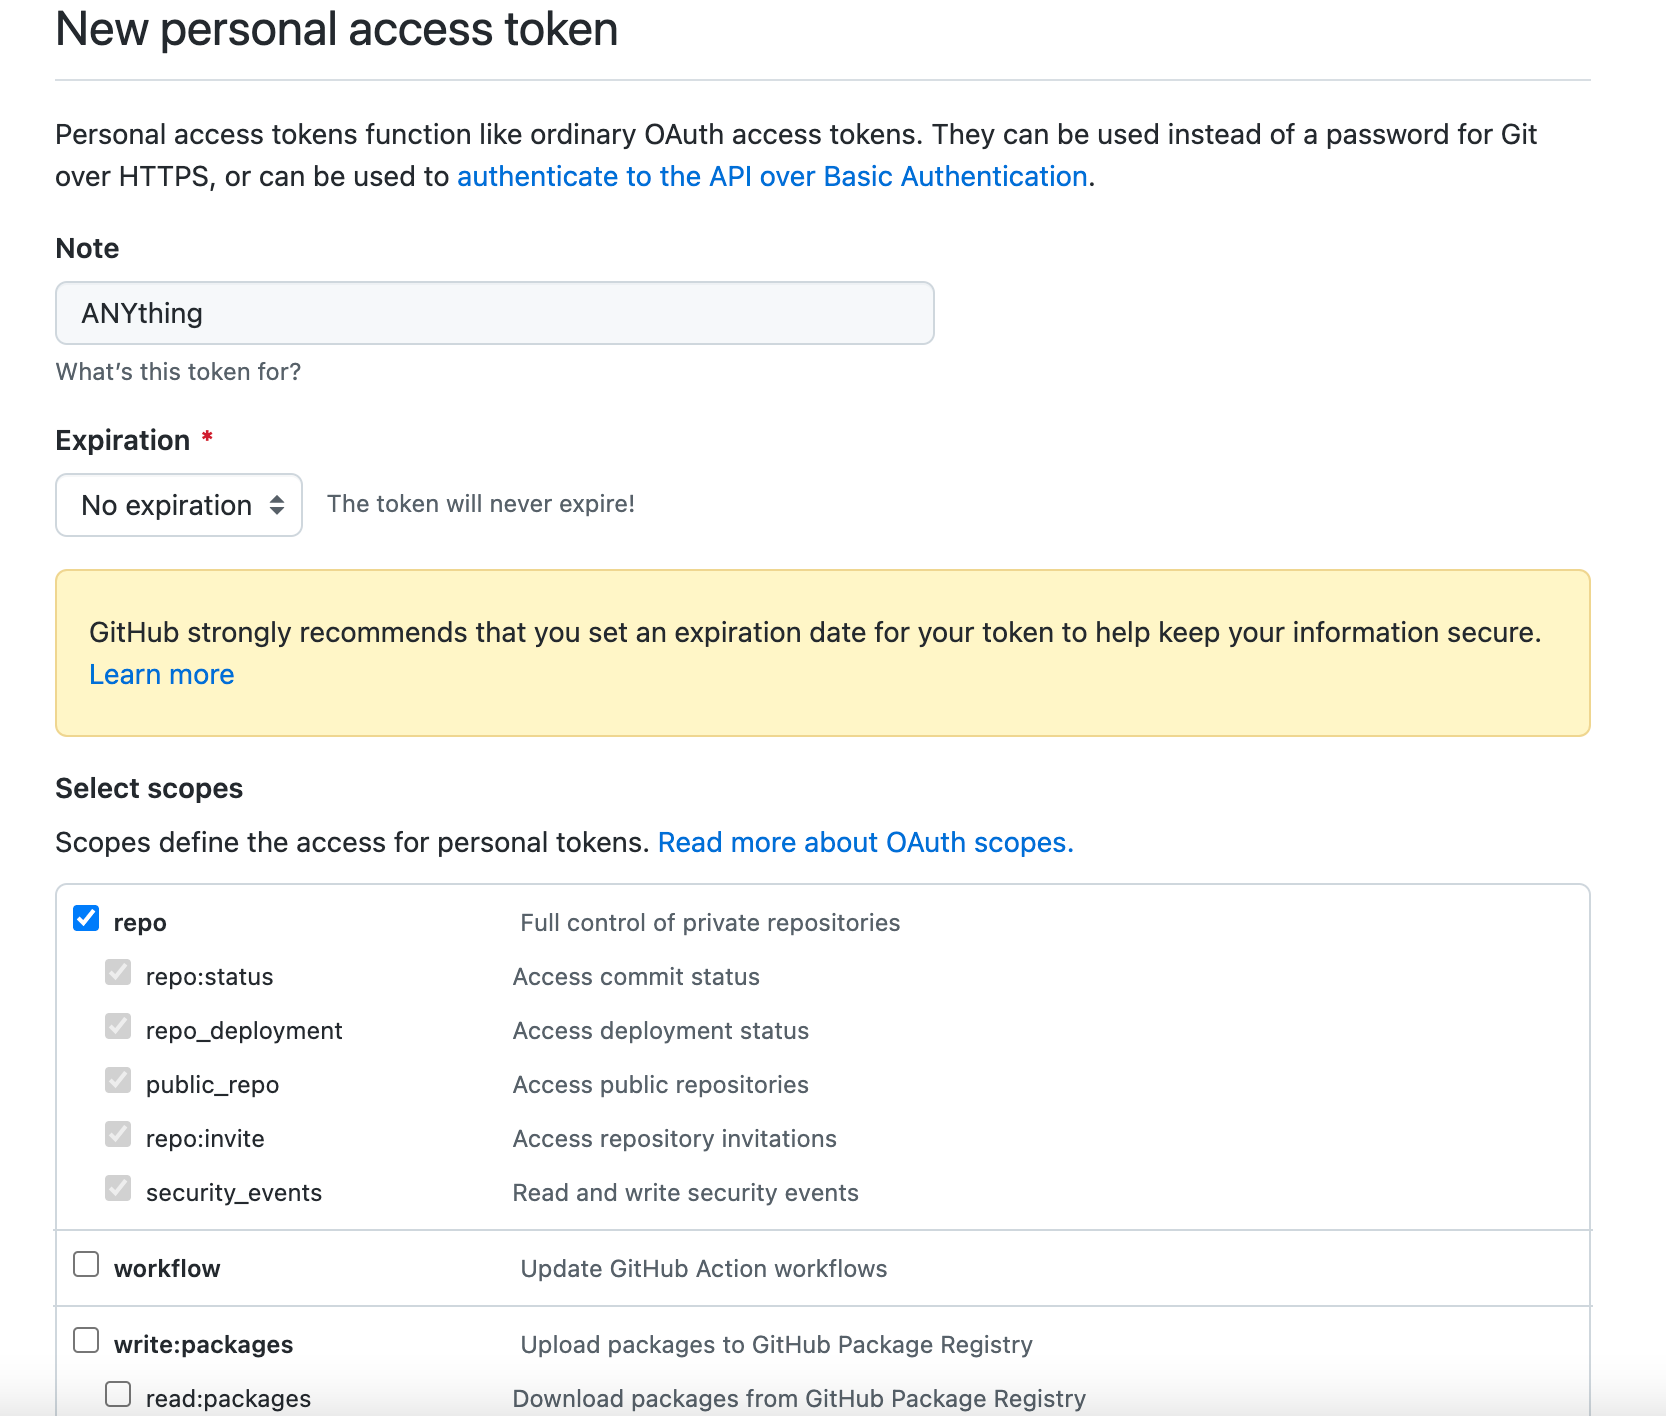
Then click Create. Copy the token and keep that token safe because you can only see it once
Now you can login and clone.
Account is your Github email address
Password is your Token
2.3.5 Hexo-cli use guide
Everytime after you change hexo files, you can use the following command to let the blog run locally.
1 | $ hexo s |
When you see this message, you can open http://127.0.0.1:4000 or http://localhost:4000 and check your blog

You can press Ctrl+C to stop running the blog locally
If there’s no problem with the changes, you can use Git to push files to Github
First cd to the folder that you store your blog file
Check file status:
1 | $ git status |
Add All the changed files:
1 | $ git add --all |
Commit these files
1 | $ git commit -m "Things you want to name this commit" |
Finally, push them to Github
1 | $ git push |
After the push, Vercel will automatically pull the files and deploy the server. After about 40s, you can check the blog with Vercel’s domain/Your domain
3.Use Guide
Official use guide is [Here]. I will introduce some basic tricks to you.
3.1 Install a theme
This is very simple. Find the theme you like on Github and there will be installation guide in the README.md file
For example, the theme I made is Redefine

Follow the guide. Finally edit the config.yml file in your Hexo root directory, and change theme: landscape to theme: keep
Run it locally. If there’s no problem, follow Step 2.3.5 and push it to Github
For specific theme customization guides, see the theme’s own documentation.
3.2 Install plugins
You can find many plugins on Hexo official site or on Github
The plugin’s description will tell you how to install it as well
Such as this sitemap plugin

After the installation, follow the plugin documentation, add the parameters to the _config.yml in the hexo root directory.
Like this one:

Run it locally. If there’s no problem, follow Step 2.3.5 and push it to Github
4.Summary
Hexo Blog is for those who like to customize their own blog.
If there is any problem with the installation, please contact me and I will reply in time.
Email address: contact@ohevan.com
If this guide is helpful to you, feel free to leave a comment and let me know.
Thanks for reading!
- Title: How to use Github and Vercel to Deploy a Hexo Blog and Config it
- Author: Evan Luo
- Created at : Sep 3 2022 12:19:26
- Updated at : Feb 20 2026 23:46:46
- Link: https://ohevan.com/vercel-hexo-configuration-en.html
- License: This work is licensed under CC BY-NC-SA 4.0.